

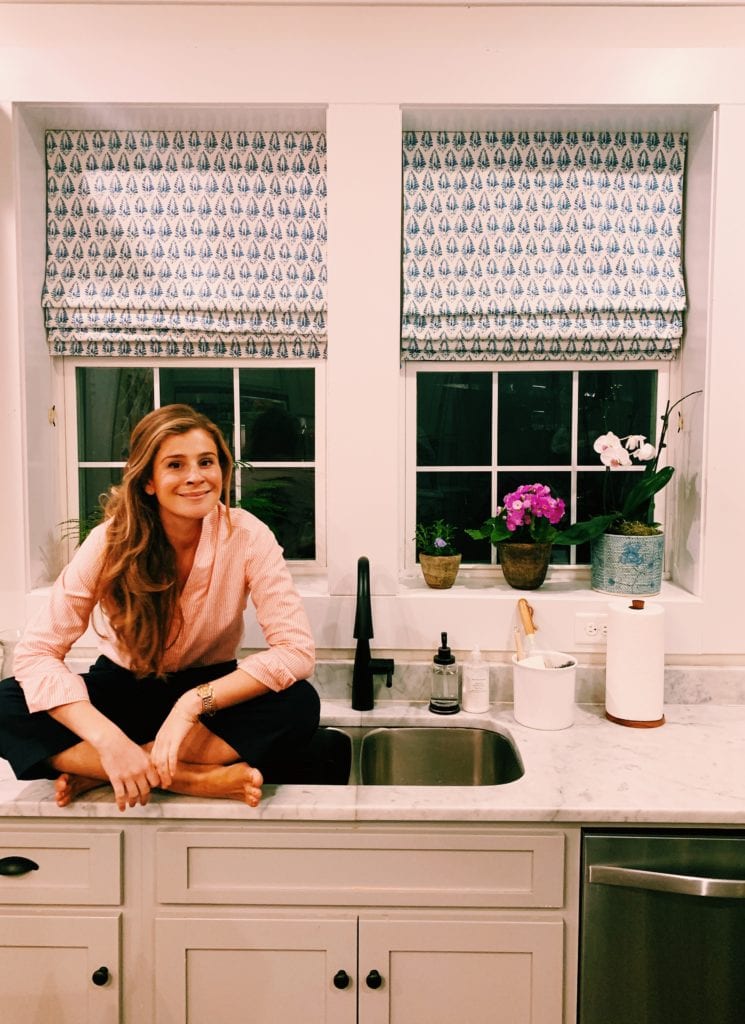
One Sunday afternoon last year, I picked up a new sewing machine and some fabric and made roman shades on my Instagram stories. It was a vulnerable and amusing exercise — nobody, including myself, had any idea whether it would work out (I will say there was some liquid courage involved), and luckily for us, it did! We ended up with two new blinds for our kitchen and much curiosity about what resources we used to get it done.

I should preface by saying that while I did take some sewing classes when I was little, I never graduated beyond the Christmas pillow (of which I made about 100) and certainly never made it onto the sewing machine. When it was clear I would never get beyond the basic stitches, my teacher gave up on me and that was the last time I touched a needle and thread! I don’t think I’ve ever attached a button…
All this is to say that SURELY if I can do it, you can too.
The sewing machine I selected was from Walmart, and I googled how to use it and found the old DVD uploaded onto youtube and practiced on some scraps before committing to the curtains. I recommend fun background music for this bit to boost morale. If you’re going to try it, you should either buy the same machine or I think most manuals should be available online, or perhaps you have some experience and understand how to turn it on/thread it etc. I did come up against some jams on my third curtain (we ended up making some for the neighbors) but it’s all pretty figure-outable.
I’m going to link to the tutorial I followed BUT we have also attempted a similar video of making a roman shade here. There were some stumbling blocks for me in the video I followed, and while I’m not sure that I am a tutorial natural, I hope that ours is understandable but at least between the two, it should be manageable.
The process is a slow one but it’s helpful to know going into it that the cuts you make at the start, etc. don’t have to be perfect (they should be close but don’t stress if they’re a bit frayed or jagged), you create the edges with the iron and you make the curtain inside out so by the time you flip it the right way, it looks pretty professional!! I also think that there are some more basic ways to do this but I will say you end up with a very sturdy, solid product here — they work seamlessly and now I every time I encounter a roman shade, I examine it and I would say these are pretttyyyyy good!!!
Also, once you make one, the rest are EASY.
Last, the materials take a second to gather — you can save yourself some time by ordering these things on amazon but you’ll probably still need to visit Lowes and a fabric store… and possibly Michaels. Anyway, it’s fun and it feels good to do it yourself!! Here for any questions and forgive my tutorial demeanor — I’m working on it!
EVERYTHING YOU NEED TO MAKE THE BLINDS:
Fabric of your choosing — must be the height and width of your window plus at least 5 inches, 10 to be safe!
Here is what you need from the hardware store:
Amazon is your friend here:
100 Yards of Shade Cord (share with your friends!)
You’ll also need an iron/ironing board! The video below is more of a “watching us do it” as I explain what I am doing… for the formal video that we followed, see here. Again, I think probably best to toggle back and forth between but we are here to answer any questions!!! HAPPY SEWING! XX