
Before we begin on this post, i’d just like to quickly debunk the idea that taking photographs is uncomplicated. It’s a hugely complex balance of light and angles and mood and make up and setting, so go easy on yourself!! We are here to make it as straightforward as possible but we implore you to go into this with an open mind and a sense of humor. Rest assured that for everybody who is posting selfies, or polished images, there are 100+ rejects and moments of frustration and it really takes persistence, practice and patience. So why bother?
Documenting your pregnancy is personal — for many of my friends who are pregnant during COVID-19, this pregnancy is something they have fought long and hard for, for others, it’s their last. For a few, it’s a combination: many years to get here and an understanding that this is a first and last. And of course there are those of us who want to capture these moments of family building and life unfolding as beautifully as possible, regardless of where we are in our pregnancy journey.

With so many pregnancy milestones cancelled because of the pandemic (baby showers, baby moons, maternity shoots), we thought it would be nice to put together a little guide of how to take photographs of this time with your iPhone, in the safety and privacy of your own home.
In the end, we found that the iPhone 11 camera is SO good that sometimes it’s really TMI — when you’re trying to capture the essence of pregnancy, the beauty of the changing body, you don’t really need a blow by blow of every vein and wrinkle, ya know?
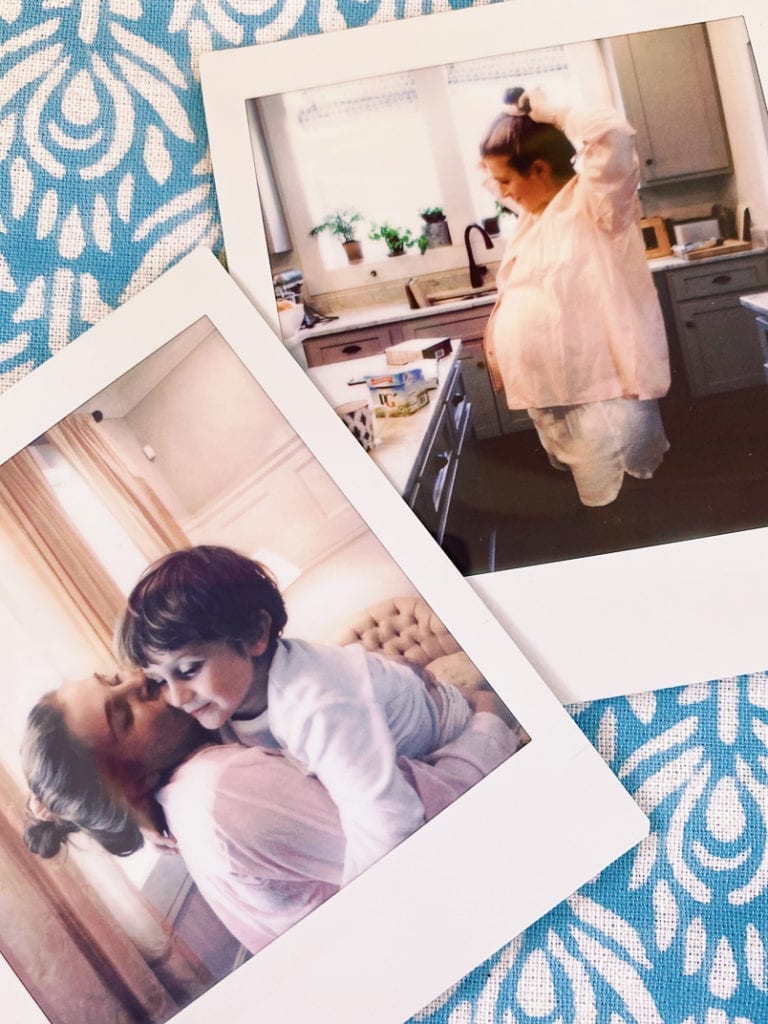
So, if you want to just skip ahead and make this a slightly easier experience, we really loved using this polaroid camera (which has a memory card) as it adds instant softness, magic and that captures that “essence” vs. the hard, cold “reality”. Still, we did persevere with the iPhone and have some tricks up our sleeves… and for those of you who are working on an earlier model of camera, great.
Ok so finally jumping in! First, I would say it’s good to identify some inspiration images that you love and then not wed yourself to them. Use them as a guide, not the be all end all. It helps to study images you love to guide body positions, what to do with your hands, mood and lighting set ups. It’s just a great starting point to riff off of.
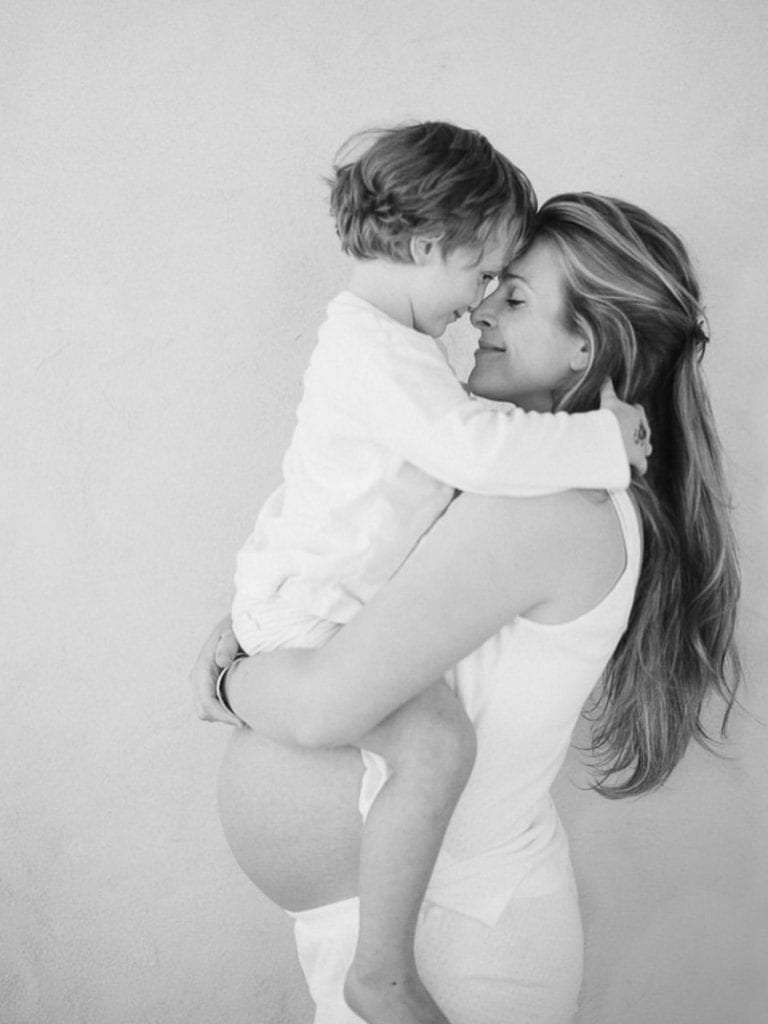
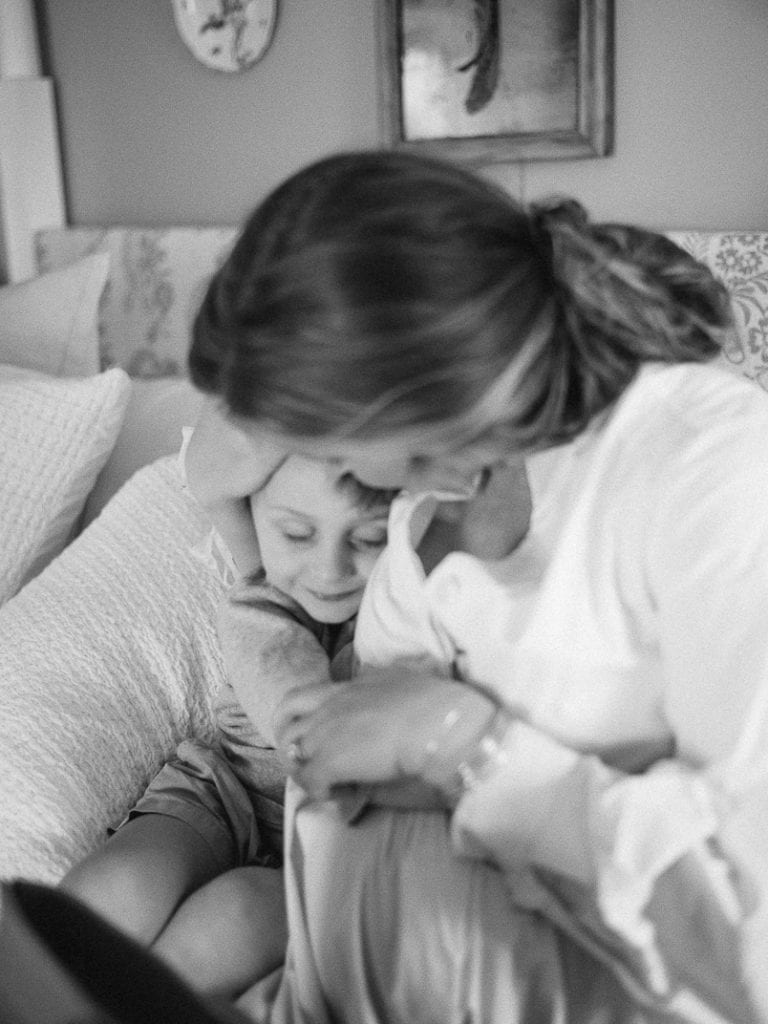
Overall, the maternity photo genre is not my favorite, I find that over posed images aren’t really for me. I gravitate towards candid images that feel more “lifestyle” than posed photoshoots but we took a whack at both because I want this to help you achieve your goals.
One last note: we did this as a partnered activity (myself and my husband) and we laughed the entire way through because it felt really ridiculous, even in the moments of pure frustration we found a way to giggle. It took a while so it’s good to discuss the project first and to realize that it’s an activity not something to be rushed through so that expectations are realistic. If you want more autonomy, you might invest in a tripod for your iPhone. Still, I think there’s something fun and romantic about doing it together but you have to have a patient mindset, it’s not a quick in and out.
Light & Airy
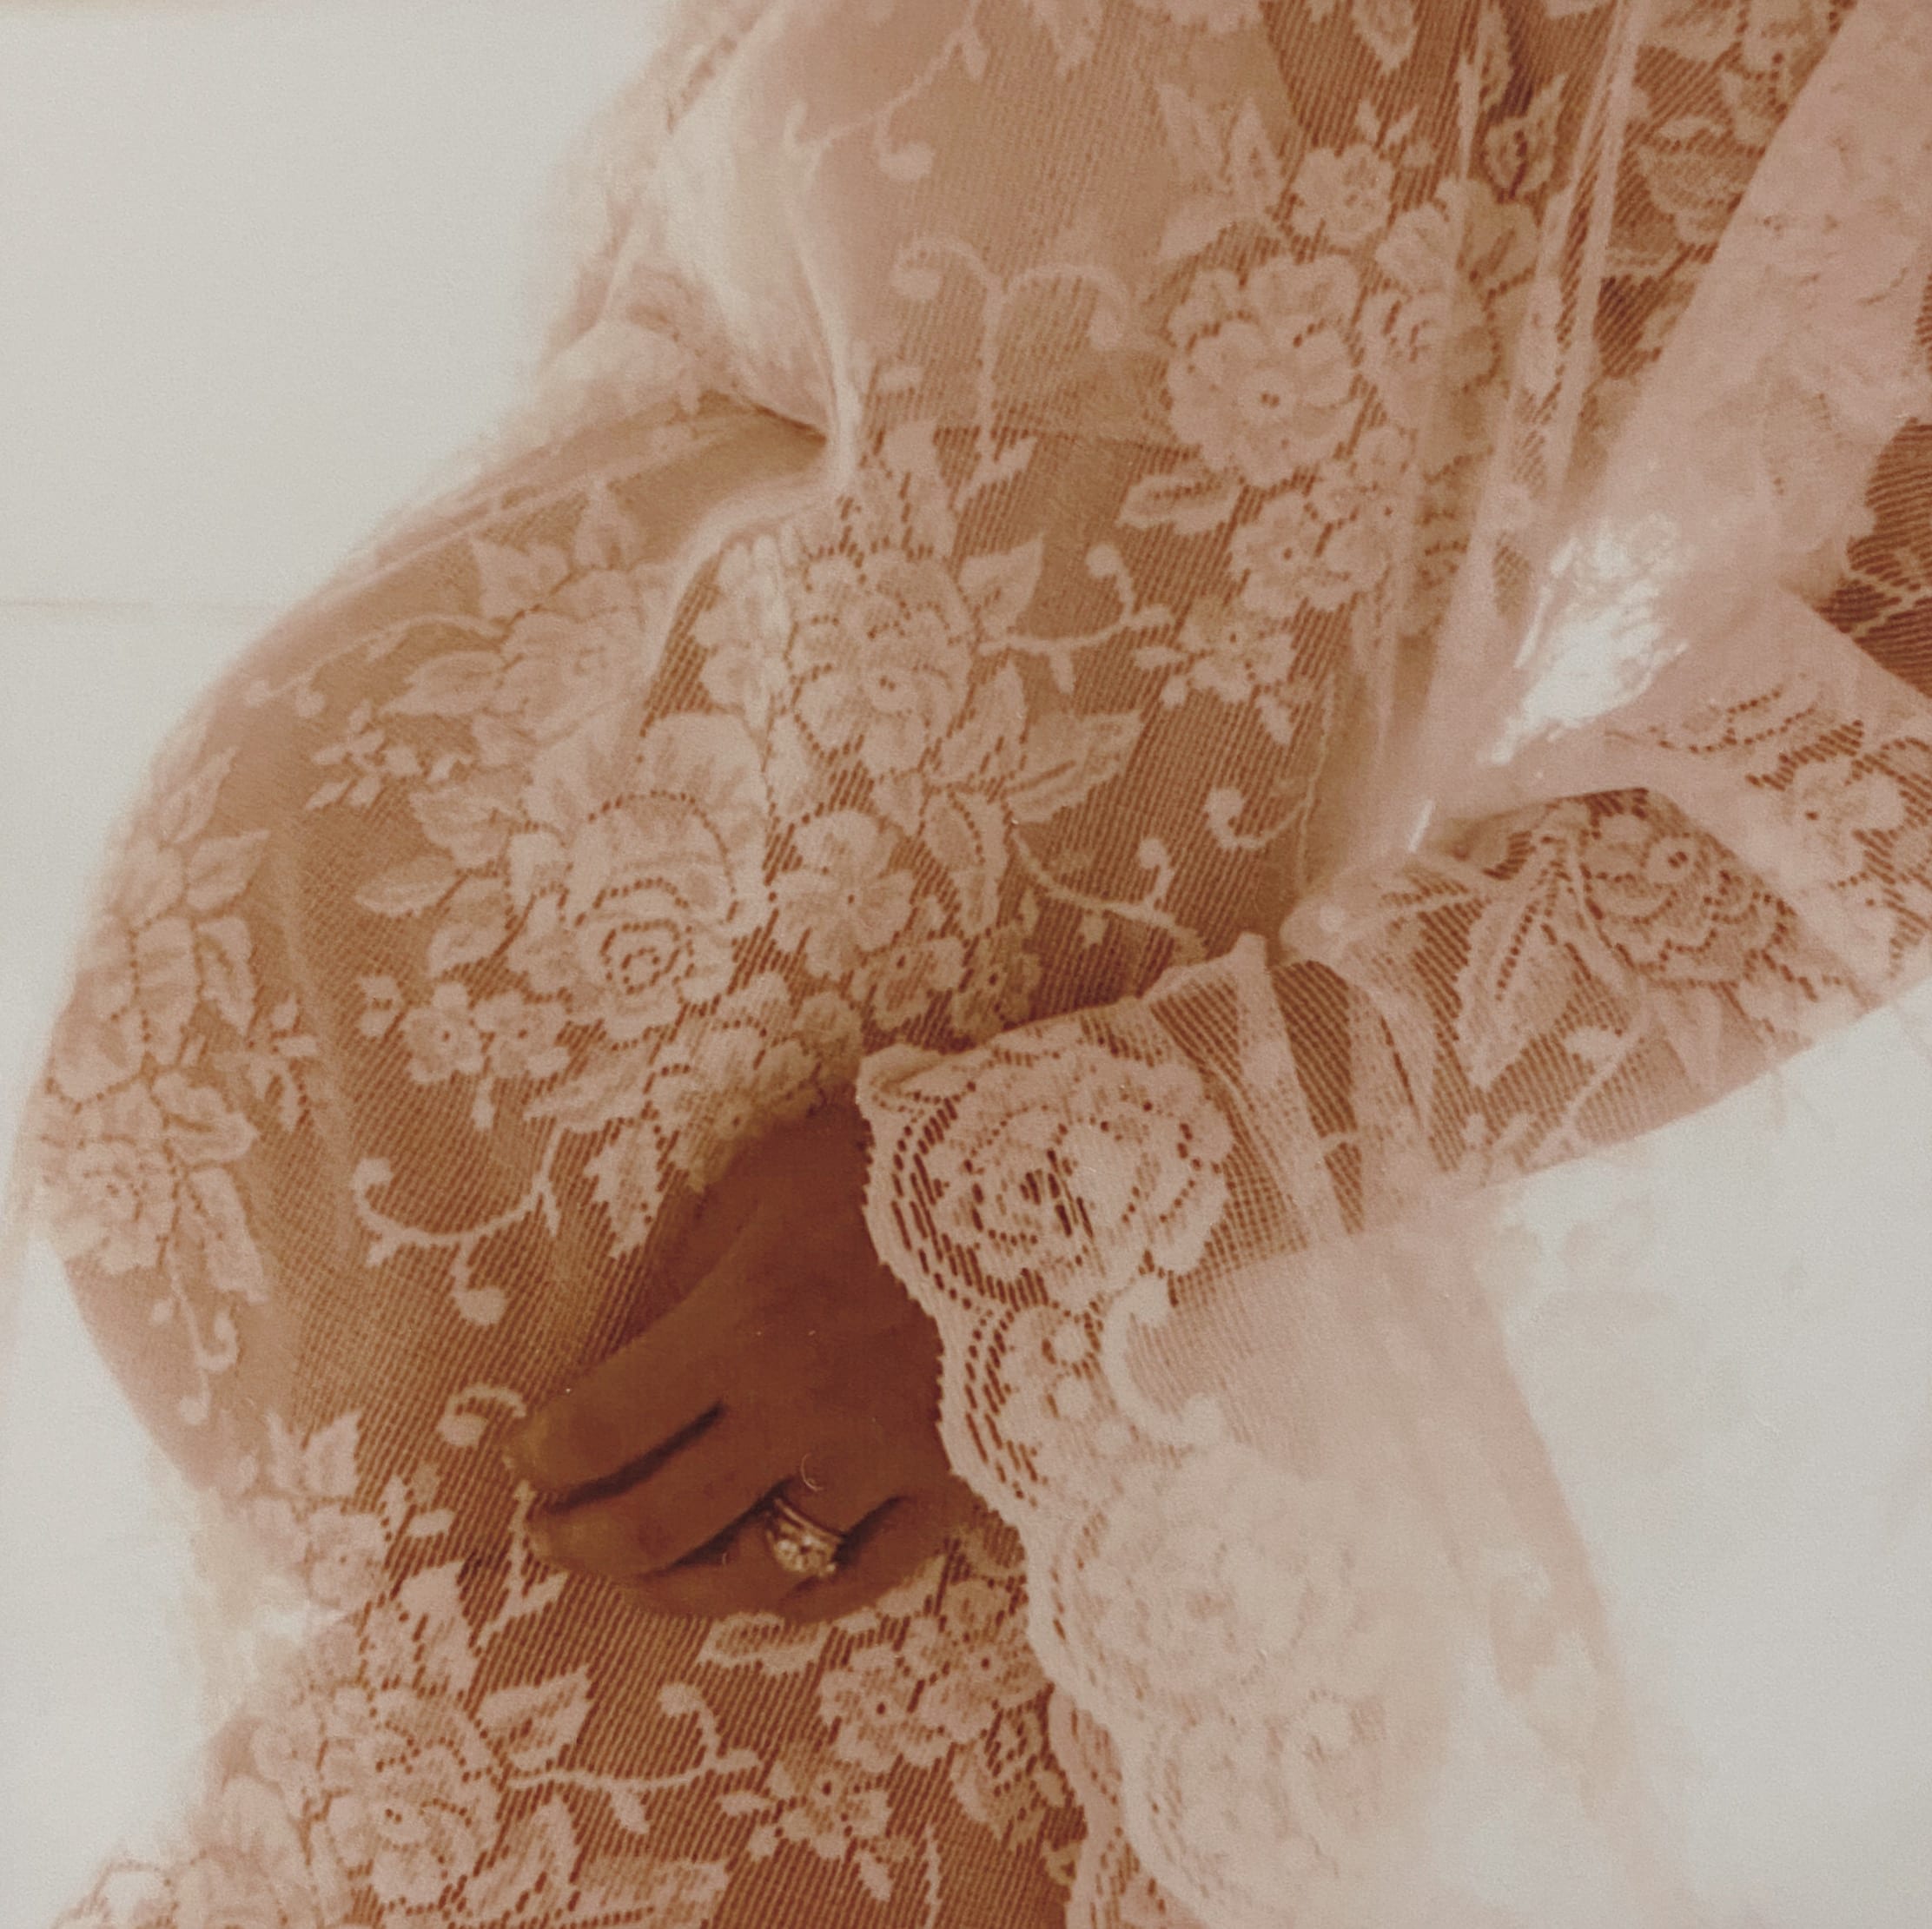
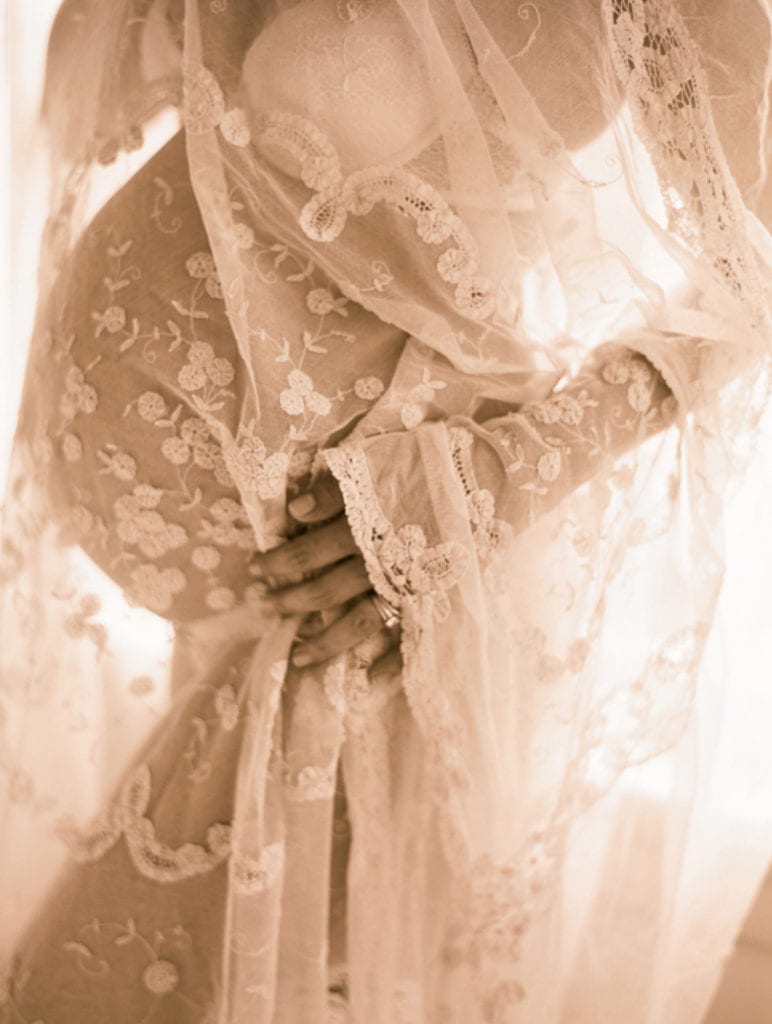
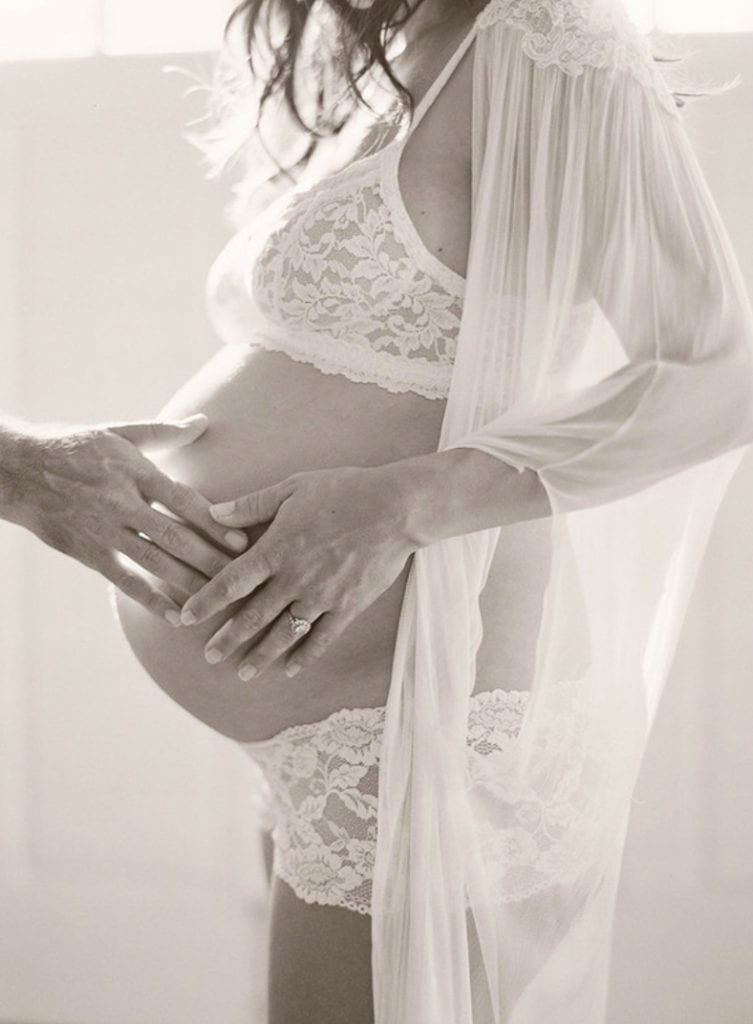
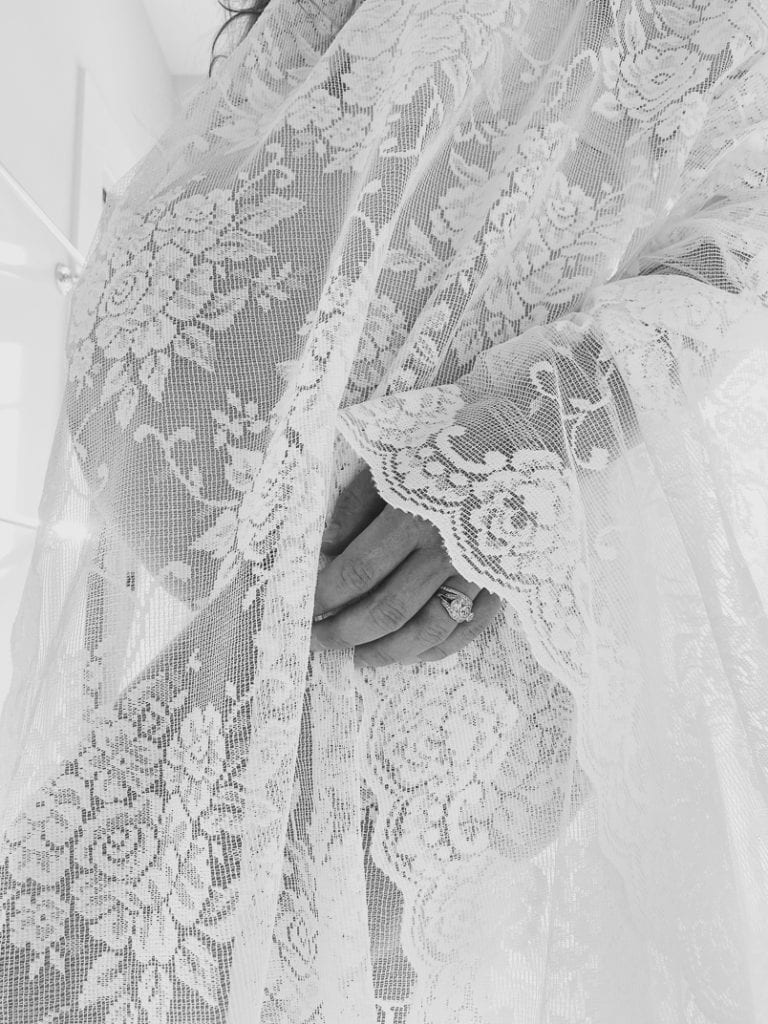
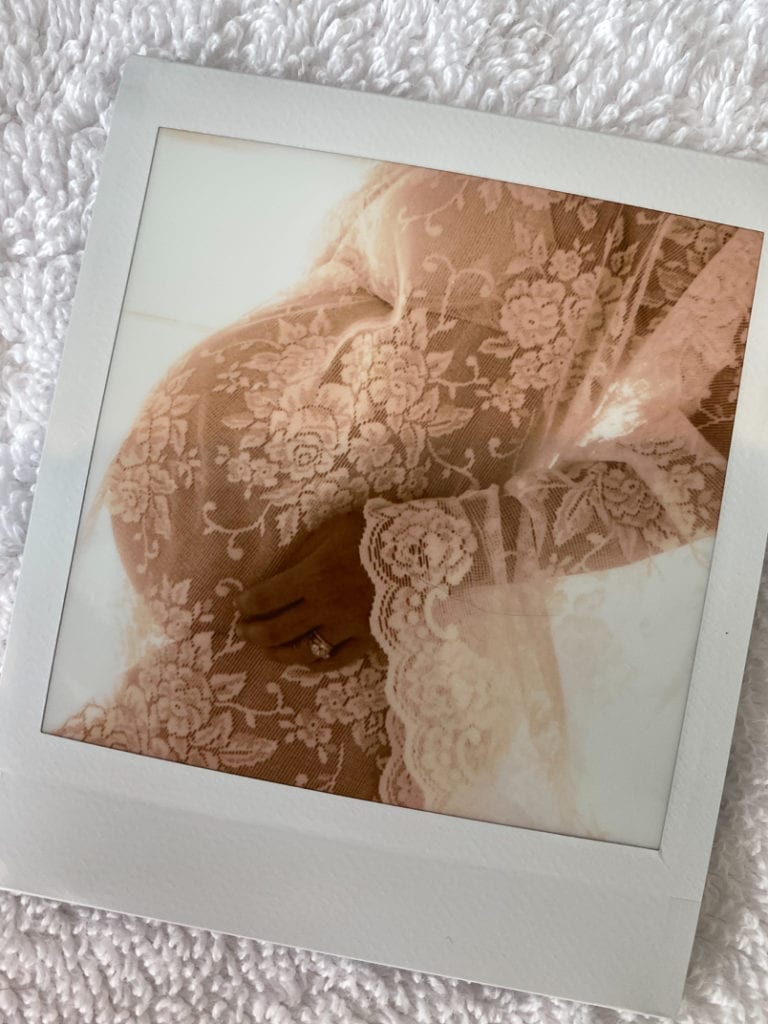
We found this style the easiest to recreate. Often backlit, or lit softly from the side, we found it relatively simple to find or clear off a blank wall by a window and to snap these types of photos. We are naturally disorganized so we used a curtain we had lying around (seriously) instead of pretty lingerie but I have found that ETSY is jam packed with pretty sheer robes and that hanky panky underwear are very forgiving. The lace works well backlit, creating softness and magic, but the side lit photo also works well for this as long as the light isn’t too harsh.
Let’s take a moment to look at the master of these images, Elizabeth Messina. I love her appreciation of the female form. Her photography is so flattering and sensual, a true celebration of beauty of women. Her portfolio is well worth looking over to understand flattering poses and soft light, here are some of my favorites from her:

I also appreciate that these images are very much abut the pregnant body vs. the face + body. The one we re-created riffs mostly off the middle image in pose, coloring and lighting set up:

TECHNICAL SET UP:
Technically this is the easiest of the three that we attempted.
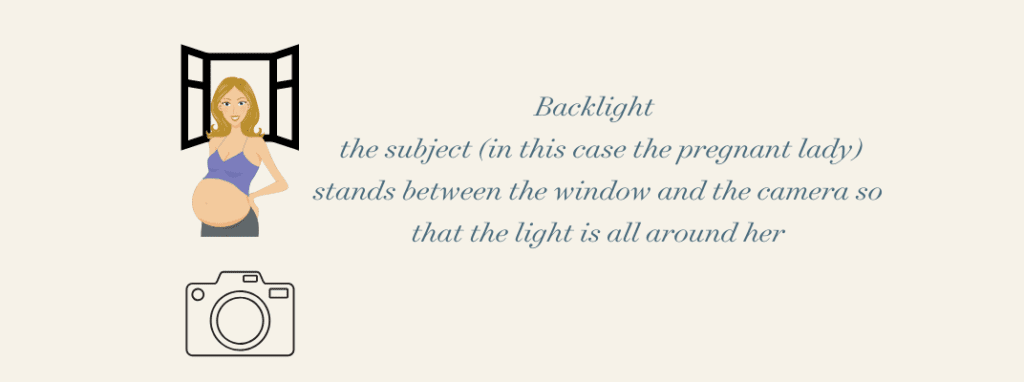
In this photograph, we are standing in our bathroom upstairs close to sunset. I am standing between Will and the window and light is flooding through from behind me. The transparent lace reveals the bump without too much else. This lighting set up is called BACKLIGHTING. Please see this basic graphic below (lol):
You need a LOT of backlight for this. In our bathroom, as the sun gets low in the afternoon, beautiful soft light floods through in the last couple of hours before sunset, so we just had to wait until the conditions were right.
The camera needs to be square on in two respects. First, it needs to be held parallel to the wall or window so it’s not tilted down or up… it needs to be held straight and then, it needs to be square on with the subject. In other words, rather than standing at his regular height and shooting my bump from his eye line, Will had to kneel down to make sure the camera is parallel with the bump.
The camera also needs to be perpendicular to the floor, hold the phone vertically straight, leaning up or down by much more than a hair will lead to unsightly bulges that you do not want, like double chins, or ginormous other things.
Practically this means that your photographer will be holding the camera level facing the window, and be responsible for adjust only two things:
- The height above the ground that they are shooting. Be prepared to squat or kneel, your comfortable height is rarely the correct one for the shot.
- The distance from the subject. In this case the photographer is about 4 feet away..
Once you are comfortable with the framing, you can focus on adjusting height only.
POSE
For the pose, this did take a bit of practice, and it’s important not to become too discouraged. I do wish I had taken these a bit earlier in my pregnancy when my bump was a bit more “cute” but we found that if I leaned forward a bit, it helped create a more flattering frame. I stood side on to the camera and was sure to keep my shoulders side on but cheat my tummy a bit more towards the camera and then kept some space between my arm and my body so that angle of the arm leads into the frame… was side onto the camera and rotated my tummy a bit closer to it while keeping my shoulders squared to be
The iphone (left below) favors subjects lit from the front and we found that the polaroid was happier in this dreamy light. You can see in the iPhone shot that you get more detail of what’s happening in the background (towel rails), the light flows through the lace a bit less and my hand is a bit much!
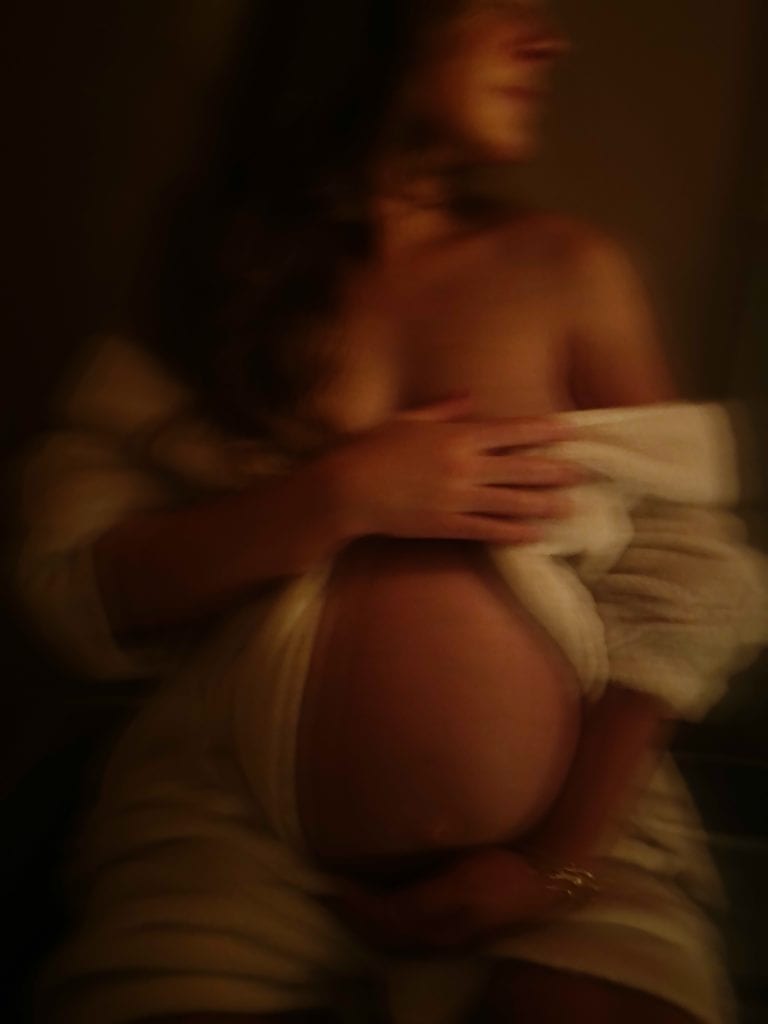
Moody & Soft
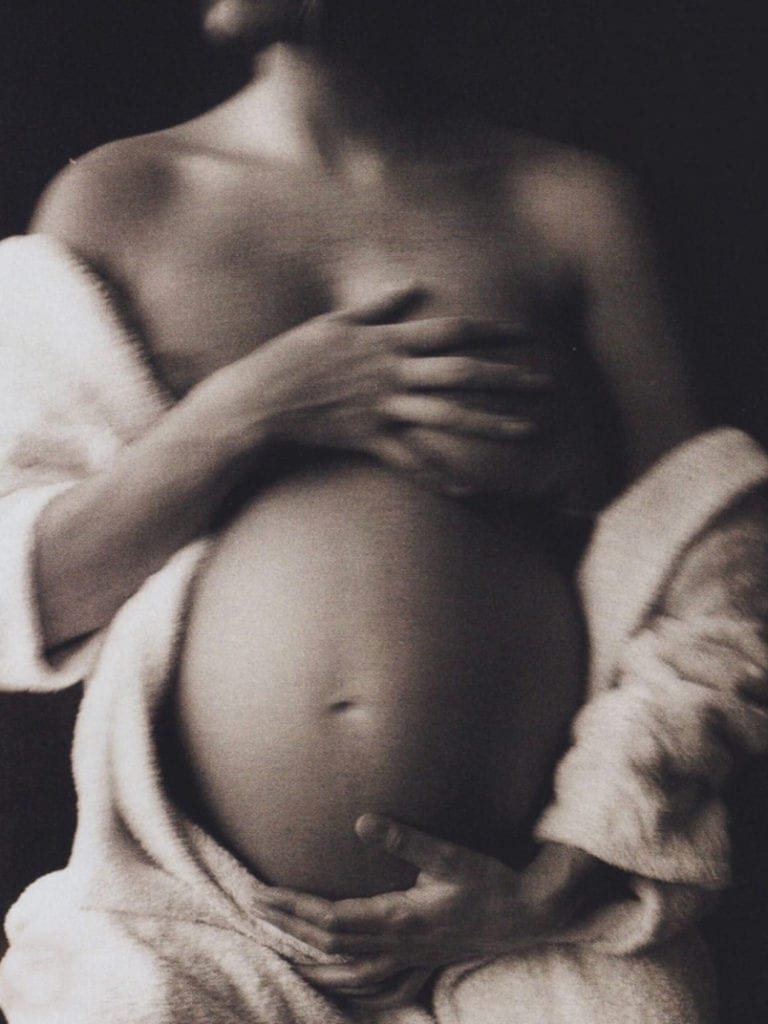
This amazing photograph is a favorite from Annie Leibovitz — it is so soft and beautiful and very hard to recreate!! See our attempt on the right:
Setup:
This photo was taken under studio conditions with a professional lighting. The shadows drop off to deep black and wrap around the subject.
To recreate this vibe at home we used candles, and we shot in a windowless interior room (i.e. closet) to achieve the level of darkness required. We didn’t have a black backdrop but you could order a piece of cloth from Michaels.
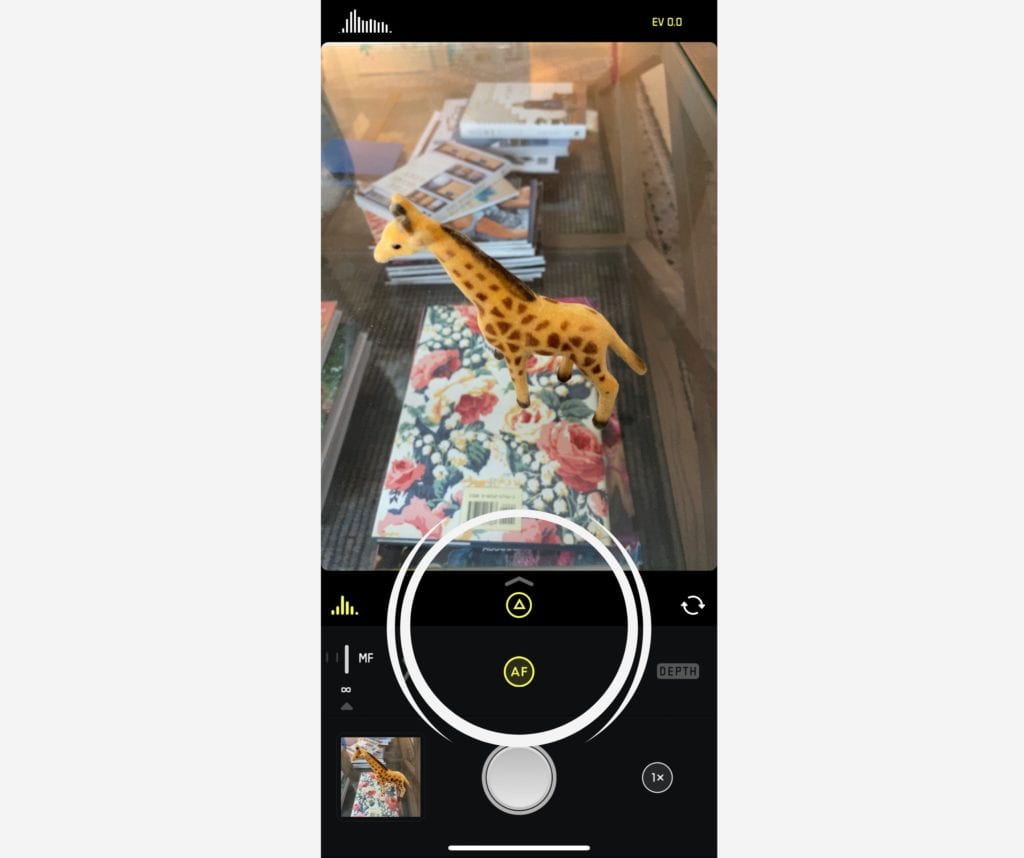
The camera app on your iphone automatically works extremely hard to compensate for the lack of light — it even automatically stabilizes hand movements when there is not enough light. For this reason, we installed a third party app that gave us control over the camera settings, allowing us to shoot on the iPhone in manual (controlling the settlings). How to achieve:
Download & install Halide
You might have to mess with your settings a bit but ours are the following (in pitch black with two tall candles):
Select ‘Manual’ shooting
Slide the shutter setting up to ½
Swipe the ISO down to 45
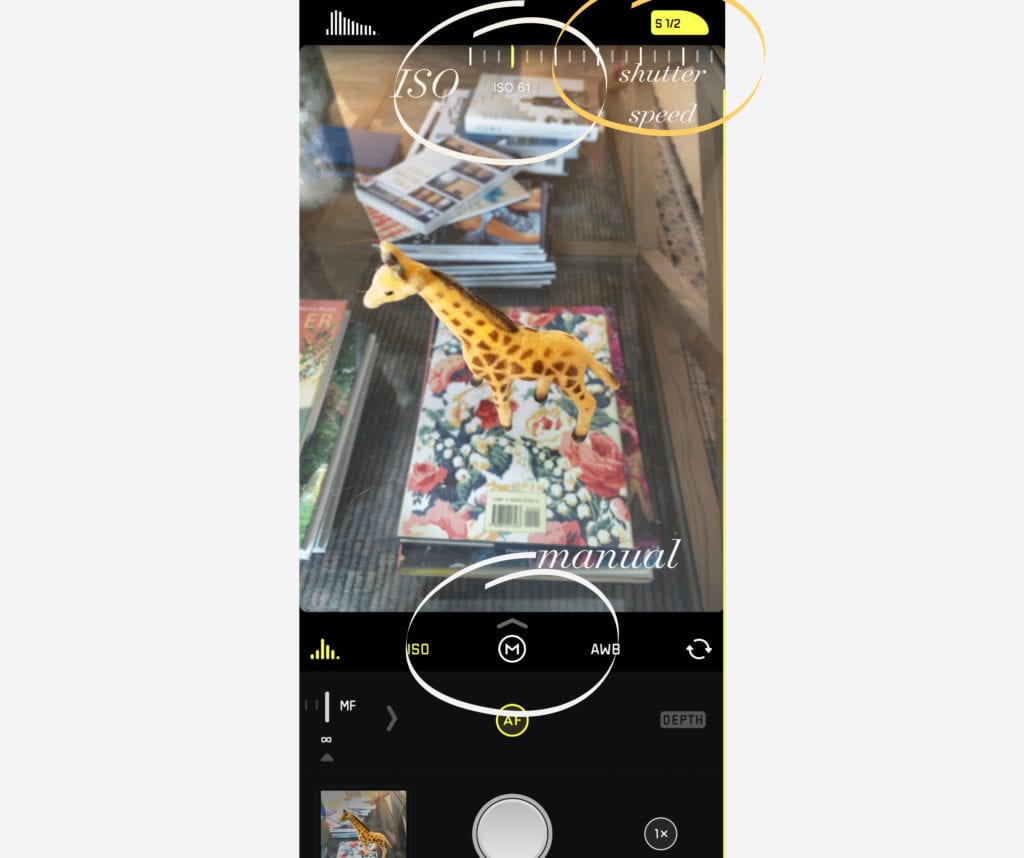
(Here is a look inside the APP — it’s a screenshot to show you where the buttons are. On the bottom panel you have to click ISO to change the settings which then appear at the top. You can see the shutter speed is on the top right and the manual setting button is on the lower control panel (you have to switch it over from the automatic setting that appears when you open the APP):
Press that button to swap over to Manual mode (“M”) and here is a tighter shot of the control settings:
In a very dark room, opening the shutter for half a second and holding the camera by hand allowed us to introduce some blur which was very necessary!
The starting position for the camera should again be square to wall and perpendicular to the floor so that it aligns perfectly with the subject. The photo takes half a second to expose and we found that making no attempt to hold still even jiggling a little helped soften the image (vs showing literally every mark/vein on my tummy).
For the pose, I needed to make myself as long as possible, shoulders back and neck elongated and actually had to lean back quite a bit in order to center my belly button which was otherwise sitting on my thigh!
The candles are all off to one side, and we placed a book behind the candles so that the light was more directed at me vs. lighting up the wall behind too. It’s not a spot on rendition but it was a fun experiment. Here is a picture of the set up (except all the lights were off and the candles were lit):
Editing:
Editing is probably the most crucial step! This photo was edited TWICE in VSCO (again it’s an app for your phone and my favorite for editing) — so I took it in, added a color preset, saved it to my camera roll, imported the version which was edited and added a black and white filter and then exported again. I did this because the contrast was getting lost in the black and white filters at first. You can see the evolution here from the straight out of camera shot to the color filter and then the final black and white:
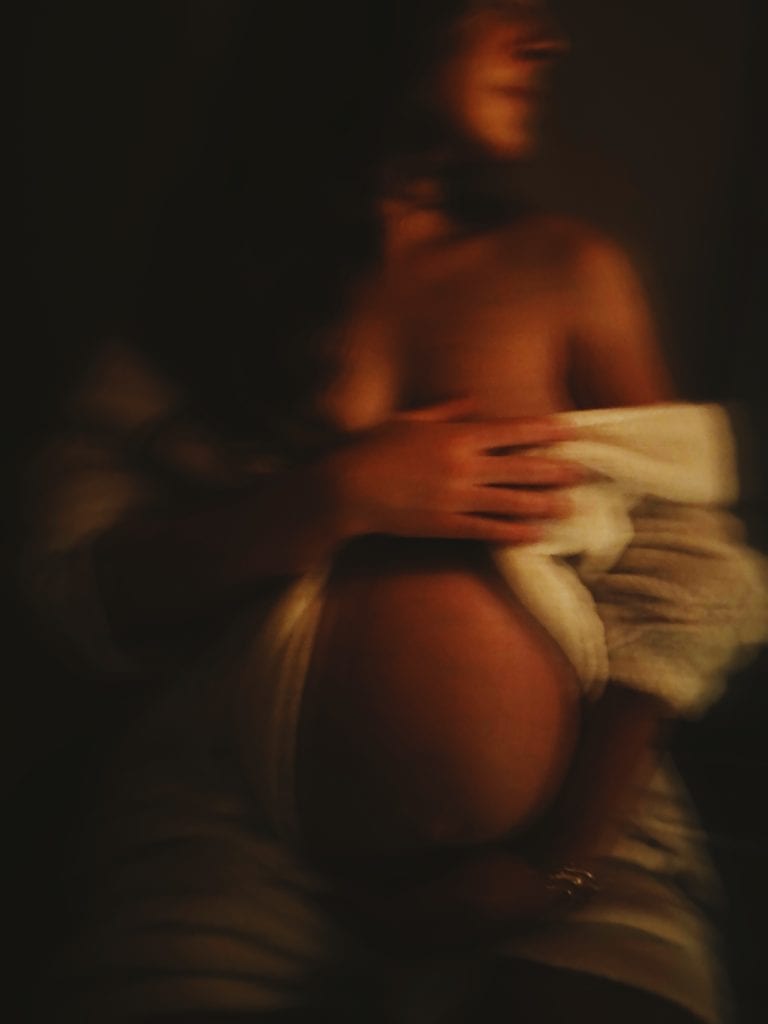
Processed with VSCO with fp8 preset 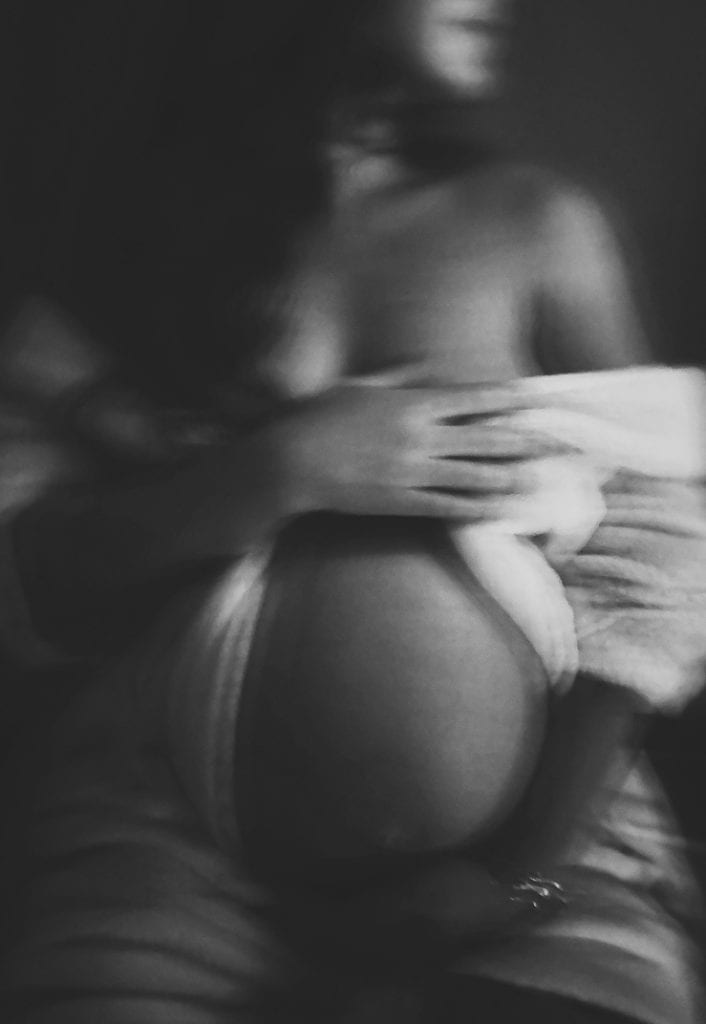
Processed with VSCO with fp8 preset Processed with VSCO with ih5 preset
Also, not that it matters but for the record that is not my nipple on left it’s my hair tucked in! Really looks like a nip though!